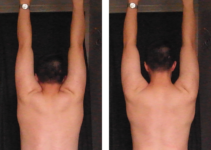
A few weeks ago I described the ideal alignment and posture to adopt when standing, but didn’t give any tool to achieve that. This week I’m going to start remedying this problem. I want to give you anatomical knowledge about the upper back and shoulders, then give you images to improve your posture. This can not be done in just one post, so this week I’ll only provide you with the anatomical part of this project, and next week we’ll tackle the images. We will discuss two crosses around the shoulder blades (scapulae): one between the scapulae and the skull, and one centred around the scapulae (well, a pair, since we have two scapulae).
The scapula
The first step is to get to know a few things about the scapula. First, it’s a very free bone, loosely linked to the spine via the clavicle, then the rib-case. It’s basically floating on our back, held in place by a variety of muscles, some of which are at the centre or our focus today. There are a few land marks that will be useful to know: the inner (medial) ridge of the scapula, the spine of the scapula, and the coracoid process. You can probably not palpate the whole medial ridge of the scapula on yourself, because it’s in the middle of the back, where one’s own hands can’t reach (except for a few extraordinary individuals), but your can get a feel for it: if you touch your lower back with one of your hands, and climb up while staying as close a possible to the same side of your back, you’ll find a bony point at about nipple height; this is the lower end of the scapula. From here, you might be able to palpate up a bit, and have a feel for where the edges of this bone lie. If you hook your fingers on your shoulder, you’ll find a horizontal ridge opposite to the far end of the clavicle. That’s the spine of the scapula. And lastly, under (as in, towards your feet) the far end of the clavicle, you’ll find a bony lump which is probably quite tender; that’s your coracoid process. I strongly recommend reading the wikipedia article about the scapula to have a fuller image of this wonderful bone.

The muscles
The first cross, located between the scapulae and the skull is made of two pairs of muscles: the splenii (singular splenius) capitis and the rhomboids. The rhomboids are located between the inner (medial) edge of the scapula and the spinous processes (the part of the vertebrae that are close to the skin) of the 6th and 7th cervical vertebra and the first 4 thoracic vertebrae (C6 – T4). Their role is to press the scapula against the back when there is an external force that drives it away, for instance if you’re crawling or pushing something. It will also drive the scapula down (in conjunction with serratus anterior and the lower part of the trapzius, which will appear in the second cross) when you’re hanging from your hands. The splenius capitis attaches at one end to the bottom of the skull, on the sides of the lobes you can feel at the base of your skull (occipital bone and mastoid process), and at the other end to the spinous processes of C7 to T4. It participates in preventing your head from falling forwards (when both sides act together), and in tilting or rotating your head (when only one contracts). Moreover, these two muscles are mechanically linked: their tendinous parts are continuous from the right rhomboid to the left splenius capitis, and vice-versa.
 The second cross centres around the scapula. It is made of 4 muscles: the rhomboids, the pectoralis minor, the serratus anterior and the lower part of the trapezius. One arm of the cross is made of the rhomboid, which we already discussed, and the serratus anterior, which is located between the rib-case and the scapula, attaching at one end to the medial edge of the scapula, and at the other end to the first 9 ribs. It is mechanically linked to the rhoboids in the same way that the rhomboids and splenius muscles are. The second arm of the cross, slightly less obvious, is made of the pectoralis minor and the lower part of the trapezius. The pectoralis minor, situated under the pectoralis major (the one most people think of when they think “pecs”), attaches at one end to the coracoid process and at the other end to the 3rd to 5th ribs. Its role depends on context, but from our point of view it pulls the scapula forward, and at its extreme, down on the front. The lower portion of the trapezius attaches at one end to the spine of the scapula, and at the other end to the spinous processes of T3-T12 (3rd to 12th thoracic vertebrae). It pulls the scapula down and towards the spine. These two muscles are not mechanically linked in the same way, but they pull on the scapula in opposite directions.
 Now spend some time moving around, just thinking about these elements. You can try to plapate as much of you scapula as you can reach, maybe working with a friend to find theirs, or asking them to help you find yours, try and make a mental image of where this bone is, and how it moves. You can also try and palpate the areas where these muscles are, find what movements make them contract (when a muscle contracts it bulges and becomes hard; a change easily identifiable under your fingers), and how focusing on one of them affects your movement. Finally, come back next week to discover how you can use this newly found anatomical knowledge to image your way to a new posture!
Want more like this?
Check out the following blogs from massage therapists I know from around London:- On The Run Health and Fitness on running, nutrition and sports massage.
- The Soma Room on sports massage and exercise.


No Responses