Meditation can help us calm down after a hectic day and reconnect with our self, and has many benefits including lower levels of stress and improved sleep. This guide to breathing meditation is here to get you started, or to help you advance on your journey. Whether you’re just exploring options, or already a seasoned practitioner, I’m sure you’ll find something interesting here.
Step 0 – Choose a position
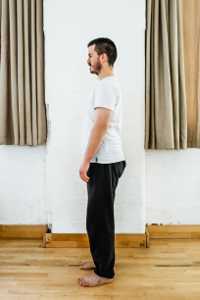
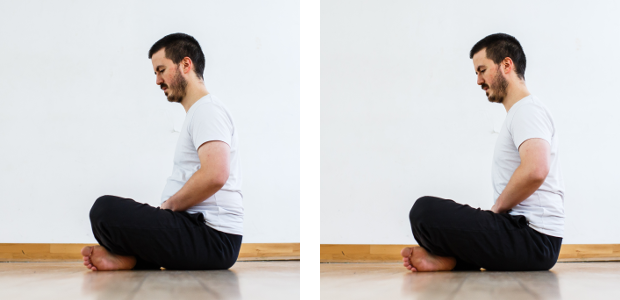
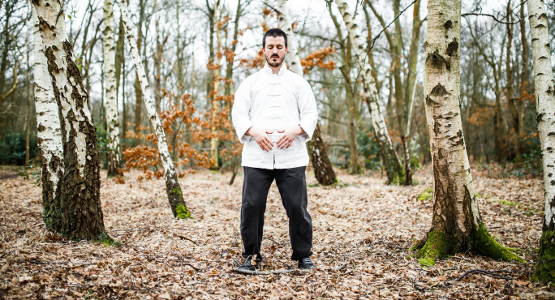
Find an active rest position that you can hold for a few minutes (sitting on the floor or on a chair, kneeling, standing…). Settle in the position and relax as much as you can without sacrificing posture. Read about sitting and standing posture.
Step 1 – Regulate the speed
Breathe normally for a bit, then start noticing the speed at which you breathe. Then regulate the speed to breathe in and out for the same duration, with a short pause between each phase (breathe in, pause, breathe out, pause, repeat). Just focus on that until breathing in for four seconds (or four counts), pausing for about a second, breathing out for four seconds and pausing for one is natural. That can take anywhere between a few seconds to a dozen practice sessions. Ideally you want to breathe in through your nose and out through your mouth. It can help to make a soft “fff” sound as you breathe out.
Step 2 – Regulate the form
Breathing can take many forms, and all forms have their use. We want to relax and calm down, so we will choose a form that does that.
We want to breathe “through our belly”, that is to say by moving only our diaphragm, the main breathing muscle. First let us check how we breathe: place a hand on your chest (the top of the sternum – breast bone – is perfectty fine) and one one your belly (just below the belly button). Breathe normally and notice which hand moves most. Also notice how your shoulders are behaving, for instance by looking into a mirror.
Now breathe so that the hand on your chest, and your shoulders, don’t move at all. If that proves challenging, gently press onto your belly with your lower hand, and as you breathe in, push that hand out with your belly. Then relax and feel how the push of your hand makes you breathe out. With time and practice, this will become easy and you won’t need the hands any more.
When you can manage this form, regulate the speed at the same time.
Step 3 – Make it smooth
When you can manage diaphragmatic breathing (as describe in step 2) at 4 counts in, 4 counts out, and 1 count of pause either way, make it smooth. That means that instead of breathing in sharply for four counts, then holding your breath for one, exhaling sharply for four, and again holding for one, we want to gently start inhaling, inhale comfortably, slow our inhaling down to a halt, stay immobile for an instant, gently start exhaling, etc.
Again, this process can take anywhere between a few instants and several weeks.
Once you can easily breathe with your diaphragm, relatively slowly and smoothly, you have a solid foundation, and doing “only” that regularly will bring you tremendous benefits. At this point the “fff” sound on exhales can be dropped, as soon as you don’t need it to help you breathe out smoothly.
***
At this stage it becomes hard, and probably ill-advised, to speak in absolute numbers, and things become more “layers” than “steps”, in that you’re never really done with one, yet at some point you can still incorporate the next.
Layer 4 – Slow down
Now that you can have a full breathing cycle every 10 seconds, work on smoothly slowing it down. In some texts they mention masters that can stretch their breathing cycles over two full minutes. I’m not sure how ready I am to believe that that is possible, but definitely 30 seconds is achievable. I would say that when you reach 20 seconds, so 3 breathing cycles a minute, you can start working on the next layer, and gradually continue slowing things down.
Layer 5 – Feel the movements
As you breathe, take time to notice how your body moves. What areas of your body move in what direction and at what rate during these slow, smooth breathing cycles? What areas tense up, which ones relax to allow these movements to happen? What does your heart do? At this breathing rate, you can feel your heart beating in your chest, and you can feel the variability of your heart rate (heart rate variability is an indicator of good health). When in the breathing cycle does your heart speed up? When does it slow down?
Layer 6 – Deepen the movements
When regulating the form in step 2, we pushed our belly out. To deepend the breathing, we can also make it go inwards as much as possible as we breathe out. Note that this is different from “contracting your abs” or “engaging your core”, as this will in fact prevent maximum depth. Some muscles of your core will indeed contract, while some others will relax. And that is what will allow for maximum displacement of the area just below the belly button.
Another area worth exploring is the pelvic floor. As you breathe in, allow your pelvic floor to descend. As you breathe out, take it back up. To get started on this, you can think of holding in urine as you breathe out, and letting it go as you breathe in, then slow the process down and make it smooth, so that you gradually contract as you breathe out, and gradually release as you breathe in. With time and practice, you will be able to feel the difference between the pelvic floor/perineum and the “holding pee in” movements, but that’s beyond the scope of this guide.
Layer 7 – Breathing without breathing
Now that you can feel the movements that accompany your breathing, and make them deeper and possibly stronger, you can stop breathing, and just do these movements. Notice that air will still flow in and out of your lungs. This is what I call “breathing without breathing”. Slightly less dramatically, you can shift your attention between the act of breathing, causing all these accessory movements, and all these movements, causing the breathing. This is how you can achieve the smoothest, slowest and most silent breathing.
From there experiment, feel, explore… There are many paths you can take, but most are best explored under supervision from an experienced practitioner.
If you have any doubt or question, or if you encounter anything uncomfortable during your practice along this guide, feel free to contact me, and I’ll do my best to steer you in the right direction for you.
Notes
There is a discussion of the anatomy of “belly breathing” on this post about abdominal breathing.
I started meditation as a part of my martial arts practice in 2002, and it always felt natural to me (I remember playing with various ways of breathing as early as age 4). For this reason, what I present here is mostly influenced by qigong breathing meditation practices. During dance camps (with DanceMode – highly recommended if you like exploring healthy movement!) I learned other approaches to breathing meditation and qigong, and these also motivated me to research other points of view (see recommended books below). I also studied breathing during my soft tissue therapy training at the LSSM.
Recommended books:
- Anatomy of Breathing by Blandine Calais-Germain
- The Root of Chinese Qigong by Dr. Yang Jwing-Ming
- The Art of Chi Kung by Wong Kiew-Kit
- Opening the Energy Gates of Your Body by Bruce Frantzis
Continue reading: The Ultimate Neck Self-Massage, 5 Daily Opportunities to Perfect your Posture, 3 Keys to Flexibility Training.
Want more like this?
Check out the following blogs from massage therapists I know from around London:- On The Run Health and Fitness on running, nutrition and sports massage.
- The Soma Room on sports massage and exercise.


No Responses